
The Top 18 Tips for Getting More from Maya

The Top 18 Tips for Getting More from Maya
Maya is one of the most versatile digital design software packages around. Many architects and engineers use it because it gives them free rein over their models. These are the top Maya tips that you need to know.
It’s impossible to work in the modern architecture and engineering sectors without digital design software. The old manual drawings don’t cut it anymore. They waste too much time, making it harder for you to keep on top of client requirements.
The big choice comes down to which digital design software package you use.
Some prefer software packages that programmers design specifically for the industry. The likes of the Revit BIM software allow you to input data and ensure your models work.
Others prefer something that offers them more freedom. That’s where Maya comes in.
Maya is a digital design and animation software that doesn’t have the same constraints as architectural design software. You can create whatever you want in Maya. The lack of restrictions means that you’re able to exercise your creativity to a greater degree.
This has made it exceptionally popular in the film and gaming industries. But architects and engineers can use it too. Maya allows you to create stunning models, plus it’s a blank canvas on which you can explore new ideas.
As with any digital design software package, there are many ways to improve your workflow in Maya. These 18 top Maya tips show you how.
Tip #1 – Creating Quick Base Meshes
Creating a new base mesh whenever you want to use your textures for the creation of new geometry takes time. Maya has a handy “Texture to Geometry” tool that helps with this.
Start with the texture that you want to work with. Now, create a new aspect plane. Make sure it has an identical aspect ratio to the image that you want to project.
Assign your texture to your new plane and choose the plane geometry. After that, head into the menu and click Modify, then Convert. You should see the Texture to Geometry option.
Find the input image and apply the tool. There you have it. A quick base mesh based on one of your textures.
Tip #2 – Use Lattices
Lattices are one of the most powerful tools for model building in the Maya software. Without them, you have to mess around with potentially hundreds of edges individually. Again, this takes a lot of time, plus you have to keep track of every little change you make.
Applying a lattice to your mesh allows you to make larger changes quickly. They’re especially useful for pulling out entire sections of a model in one go.
However, many novices miss the lattice tool because it’s tucked away in the Animation section.
Locate it and start playing around with it. You’ll get to grips with it after some experimentation and can then use it to make wholesale model changes.
Tip #3 – Remember that Maya is Case-Sensitive
This is something that trips a lot of beginners up. Maya has lots of hotkeys that can speed up the design process. However, it’s also case-sensitive. Having caps lock applied can mess up the hotkey.
Here’s an example. Shift + H quickly shows a selection. However, Alt + h hides it.
Did you notice the difference there?
It helps to create a list of hotkeys in advance, so you can check which case each action needs. If a hotkey doesn’t work, try pressing the caps lock key. It’s one of the top Maya tips for preventing a lot of needless brow furrowing.
Tip #4 – Keep Using Quads
You’ll typically build Maya models using a combination of quadrilaterals and triangles. There are also N-gons, which add some complications. Many sculpting packages don’t like N-gons and they can mess up the model when you import it.
N-gons are also less predictable than the standard shapes. This makes them more difficult to envelope in Maya. It also leads to inconsistent results when you’re adding textures to your models.
Use quads as much as possible to keep things simple. The occasional triangle isn’t an issue, but too many N-gons cause problems.
Tip #5 – Use Soft Selection
Like lattices, soft selection allows you to avoid a lot of time spent moving individual vertices. It also works with faces and edges.
Select a transform tool and press “b” (note the lower case). This activates soft selection.
With soft selection on, any change you make to a single vertex or edge gets reflected in the surrounding vertices and edges. Those nearby undergo more drastic changes. Those further away experience a less pronounced change.
Soft selection works best when you’re trying to get subtle features right.
As an added tip, hold “b” and use the left mouse button if you want to expand the area of soft selection’s influence.
Tip #6 – Tackling the Green
Have you ever worked on a model and noticed a green patch?
That’s something to pay attention to. Green means that whatever you’re looking at doesn’t have a material assigned to it. You may have forgotten to assign it or accidentally deleted it during your work.
Getting rid of the green is easy. Just assign a material to the shape and it goes away.
Tip #7 – Use Backface Culling
You’ll notice that your scene starts lagging whenever you import a complicated piece of geometry. That’s because the Maya software has to dedicate more resources to displaying the geometry correctly.
The kicker is that you often don’t need Maya to show everything. That slowdown creates a time cost when working on projects.
Backface Culling offers a solution. Head to Shading and switch Backface Culling on. This prevents Maya from drawing any backfaces in the scene, which means the Maya software uses fewer resources.
Tip #8 – Use Duplicate Special
There’ll be a few times when you need to replicate an element or shape throughout a model. Making a fence is a good example. Fences stay uniform for their entire length and often wrap around the main model. Each panel is exactly the same, which means you waste time if you build each one individually.
Duplicate Special solves that problem.
Use it on the element in question and you’ll be able to create multiple duplicates that you have full control over. The tool lets you change the scale and orientation of the duplicated elements. Add your settings and let the tool handle the placing for you.
Tip #9 – Isolate Instead of Hide
Having the entire model in the way is a hassle when you just want to work on a single element.
Most people go through the menus to hide the bits of the model that they don’t need. That works well enough, but it also wastes time.
Instead, select the element or object and press Ctrl + i. This isolates it from the rest of the model so you can work on it individually.
Knowing how different hotkeys can shave a few minutes of your modelling time is the key to how to use Maya efficiently.
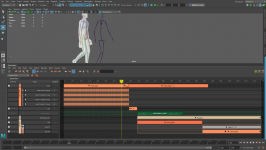
Tip #10 – Rig Often
So, you’ve finished your model and you’re ready to rig it. You finish the process, but there’s a problem.
The model has lots of deformations.
Rigging highlights issues that you may miss when working on the base model. Waiting until the end of modelling to rig may leave you with too many deformations to deal with efficiently.
Instead, rig the model whenever you make major changes. You’ll catch deformations early, so you can deal with them before they become major problems.
Tip #11 – Use the Relax Tool
Switching smoothing on often reveals lumps all over your model. Much like the deformations that rigging highlights, these lumps aren’t easy to spot when working on the base model.
The Maya software’s sculpting brushes can help you to tackle these lumps. The most useful of these is the Relax brush.
Relax averages the space between every vertex on the shape, which usually does away with lumps. It doesn’t always work, but it’s worth trying out if you don’t want to spend ages fiddling around with individual vertices.
To access it, select the object and click the right mouse button. Select Paint, then Sculpt, then choose the Relax brush from the Sculpt Parameters section. Run it over the lumpy surface to smooth it out.
Tip #12 – Quick Viewport Switching
The Space bar is your friend when it comes to switching viewports.
Give it a tap whenever you want to minimise the viewports you’re working in. To maximise a viewport, hover your mouse over a minimised viewport and tap Space again.
This only saves you a couple of seconds each time you use it. But think about the amount of times you switch viewports and you’ll realise why this is one of the top Maya tips.
Tip #13 – Save Selection Sets
Imagine you’ve just spent ages selecting a bunch of faces so you can make a few changes to your model. You finish the task and move onto the next thing. A couple of minutes later, you realise you have to make more changes to the previous selection. You have to go back and spend more time re-selecting every element.
Actually, you don’t.
The Maya software lets you save any selection sets that you think you may use repeatedly.
With everything you need selected, click Create, then Quick Select Sets. Name the set and click the OK button to save it.
You can put the set on your shelf for quick access, or head to Edit, then Quick Select Sets to find it again.
Tip #14 – Accessing the Hotbox

The Space bar becomes useful again when it comes to menu navigation.
Hold the bar down to open up the Maya software Hotbox. This contains almost every useful menu that Maya has.
It’s another small tip that saves a couple of seconds each time you use it. But making those little savings is how to use Maya efficiently.
Tip #15 – Use Numbers to Switch Viewport Modes
The numbers 4 to 8 switch your viewport’s mode in a flash, so you don’t have to go through any menus.
Here’s what each does:
- 4 – Activates the wireframe
- 5 – Switches to the shaded viewport
- 6 – Activates the textured viewport
- 7 – Turns on the lit viewport
- 8 – Switches paint effects on
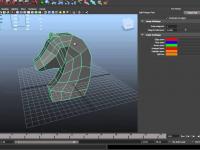
Tip #16 – Keep Track of Your Poly Count
The more polygons in your model, the slower your workflow. More polygons place greater demands on the software. It’s also easy to build up unnecessary polygons as your models become more complex.
Keeping track of your polygons lets you recognise when you’re going overboard. Head to the Display Menu and click Heads-Up Display. Turn the Poly Count on and you’ll be able to keep constant track of your polys.
Tip #17 – Break Large Models into Small Parts
Once you’ve created your base model, you’ll want to add detail. This complicates the entire model and is often difficult to do with a full structure.
Break your large models into smaller parts to deal with this complexity. This allows you to focus on each task before bringing all of the parts back together again.
It’s one of the top Maya tips for lessening confusion when working on large models.
Tip #18 – Enabling Mental Ray
Mental Ray allows you to render your Maya models. You should find it in your Maya software’s Rendering menu, but it has a habit of disappearing.
You can get it back easily if that happens. Head to Windows and click Settings. From there, click Preferences and then Plug-in Manager.
You’re looking for a file called Mayatomr.mll. Enable it and Mental Ray should reappear in your Rendering menu.
Conclusion
Each of these tips improves your efficiency when using the Maya software. Some save huge amounts of time, whereas others may only shave seconds off your design process. However, combining them all leads to huge overall time savings when building models.
These tips work well for those who already know their way around Maya. But what about those who are new to the software?
That’s where ArchiStar Academy can help. Our Maya Essential Course teaches you the basics of this digital design software.
If you have any questions or would like to get started, contact ArchiStar today.
ArchiStar Academy offers several courses across the spectrum of digital design software. You’ll develop your skills, allowing you to create more accurate and functional models.
Please don’t hesitate to get in touch with Archistar Academy today if you have any questions.
If you would like to share your thoughts on our blog, we’d love to hear from you!
Get in touch with the ArchiStar Academy community via Facebook.
Posted on 20 Jan 2020